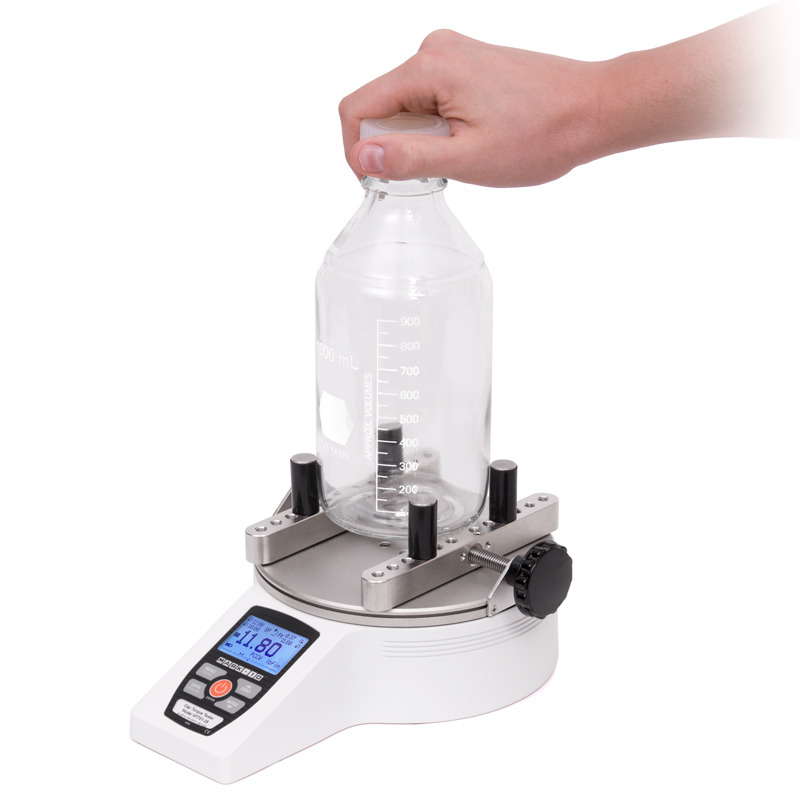
Caps torque transducers for measuring the tightening and opening torque of caps
Easy to use both in the metrology laboratory and in the production line
Measurement of the torque peak for control of the tear point and the yield point of the thread
Applications on bottles, flacons, jars, vials and tanks
Description
Torque tester for caps to measure the tightening torque, both during screwing and unscrewing, of bottle caps, drums, containers, jars, bottles, receptacles and jerry cans.
The cap torque transducers of the CAP-TT01 series are designed with the aim of measuring the screwing and removal torque of caps from 0,1 Nm up to 11,5 Nm (100 lbFin).
Adjustable supports efficiently hold a wide range of container shapes and sizes, while optional flat and adjustable jaws are available for special profiles. The robust aluminum design and the simple and intuitive use allow the use in the laboratory and in production environments even by non-expert personnel.
The accuracy of ± 0,3% of the full scale and the incredibly fast sampling rate of 7.000 Hz guarantee precise and reliable test results, even in fast-acting applications.
The cap torque transducers of the CAP-TT01 family include a range of sophisticated production control support functions, including USB communication port, RS-232 port, Digimatic Mitutoyo interface, analog outputs, reset when the cap is removed, memory for 1.000 readings, indicators and good / reject outputs.
One is also available password protection to avoid unauthorized changes to settings and calibration.
CAP-TT01 cap torque transducers include MESUR Lite data acquisition software. MESUR Lite groups data in continuous or single point mode. The data stored in the CAP-TT01 memory can also be downloaded in a single block. The export of the detected data to Excel allows further analysis of the data and the generation of measurement reports.
Models available
The data shown in brackets alongside the maximum measurable value refers to the resolution of the display.
| Model | ozFin | lbFin | lbFft | n.m | Nm |
| CAP-TT01-12 | 192 (0.1) | 12 (0.005) | 1 (0.0005) | 135 (0.1) | 1.35 (0.001) |
| CAP-TT01-25 | 400 (0.1) | 25 (0.005) | 2 (0.0005) | 290 (0.1) | 2.9 (0.001) |
| CAP-TT01-50 | 320 (0.2) | 50 (0.02) | 4 (0.002) | 570 (0.5) | 5.7 (0.005) |
| CAP-TT01-100 | 800 (0.5) | 100 (0.05) | 8 (0.005) | 1150 (0.5) | 11.5 (0.005) |
Documentation and order codes
| Code | Model | Description | Documentation |
|---|---|---|---|
14-23-87 | CAP-TT01-12 | Torque tester for caps with measuring range up to 1.35 Nm | Product details |
14-31-20 | CAP-TT01-25 | Torque tester for caps with measuring range up to 2.9 Nm | Product details |
14-17-39 | CAP-TT01-50 | Torque tester for caps with measuring range up to 5.7 Nm | Product details |
14-18-93 | CAP-TT01-100 | Torque tester for caps with measuring range up to 11.5 Nm | Product details |
Applications of torque transducers for caps
- Measurements on bottle caps for drinks, alcohol, water, fruit juices, milk
- Measurements on bottle caps for the pharmaceutical industry
- Measurements on caps for cosmetic products
- Measurements on caps with safety closures for the chemical and pharmaceutical industry
- Measurements on caps for food containers both for final consumers and for the transformation industry
- Measurements on caps or products for the preservation industry (preserves, jams, long conservation)
- Measures during the production of caps and accessories (safety closures)
Use of torque transducers for caps
CAP-TT01 series torque transducers for caps allow the easy and precise measurement of the torque required to start or unscrew the cap of bottles, flacons, jars, tubes and jerry cans.
The measurement takes place instantly and it is possible to memorize the peak value obtained. The peak value is particularly used to check the "breakout torque" of seals or the point of maximum stress of the cap.
The high sampling frequency allows to obtain a reliable peak measurement even if the event is short-lived.
Main characteristics
- Optional mobile stands and jaws for a wide range of sample shapes and sizes.
- Automatic exit, data storage and zeroing when removing the bottle cap helps automate testing processes
- Password protection prevents unauthorized changes
- The 7.000 Hz high-speed sampling rate accurately captures peak torque values
- 5 selectable measurement units (ozFin, lbFin, lbFft, Ncm, Nm)
- USB, RS-232, Mitutoyo and analog outputs
- 1.000 data memory points with statistics
- Programmable set point indicators and outputs for determining good / reject
- Configurable audio alarms
- MESUR Lite data collection software included
Technical features
| Feature | Value |
| Accuracy | +/- 0.3% of the full scale |
| Sampling rate | 7000 Hz (7000 samples per second) |
| Supply | 230 Vac mains power supply or with internal rechargeable batteries. There is an indicator of the state of charge of the matters. When the battery charge is too low, the instrument switches itself off automatically. |
| Battery life | With backlight on: up to 7 hours of continuous operation. With backlight off: up to 24 hours of continuous operation. |
| Measure unit | ozFin, lbFin, lbFft, Nm, Ncm |
| Outputs | USB / RS232: configurable up to 115200 baud Mitutoyo: Serial BCD Digimatic compatible with all Mitutoyo acquisition devices Analog: +/- 1 VDC Digital: open-drain digital alarm outputs |
| Configurable functions | Digital filters, digital alarm outputs, data output, automatic shutdown, key tones, backlight, audio alarms, passwords, calibration |
| Overload | Protection up to 150% of the measuring range. Over 110% of the range, the display indicates the overload condition |
| Weight : | 3.8 Kg |
| Warranty | Warranty up to 3 years for the measuring instrument |
| Measurable diameters | Diameters from 12,7 to 190 mm are measurable |
Composition of the supply
- Measuring instrument
- Universal power supply 230 Vac
- Battery
- User manual (in English)
- CD with MEASUR Lite software and USB driver (in English)
Details of the TT-01 series

Easy and practical use
The torque transducers for caps are easy to use both on the work bench on the line and in the metrological laboratory. Furthermore, the support on the table is made in a stable way and above all not influenced by the force applied to the cap during the test operations. The sturdy structure allows the test to be carried out even on large bottles and containers or with particularly large diameter caps.
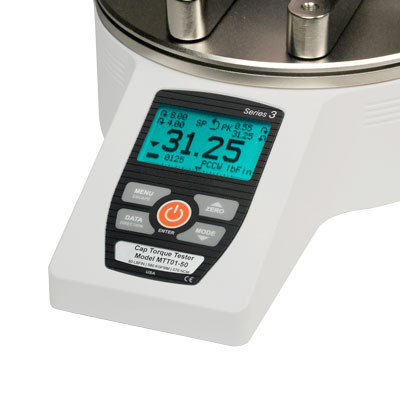
Highly readable front display
The instrument display, located on the front of the instrument, allows easy reading of the measured value and the functions that have been activated. The backlighting allows viewing even in poorly lit environments or directly on the line.
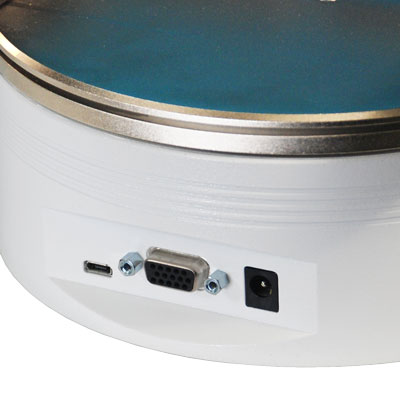
External connections
On the back of the instrument there is a connector for the connection of USB peripherals, peripherals with serial ports and Digimatic. It is also possible to generate an analog signal for connection to data acquisition systems.

Acquisition software
Included in the supply is the MEASUR Lite acquisition software which allows the display of measurements on a PC, the acquisition of torsion curves and the recording of data in Excel format.
Accessories for TT-01 series torque transducers
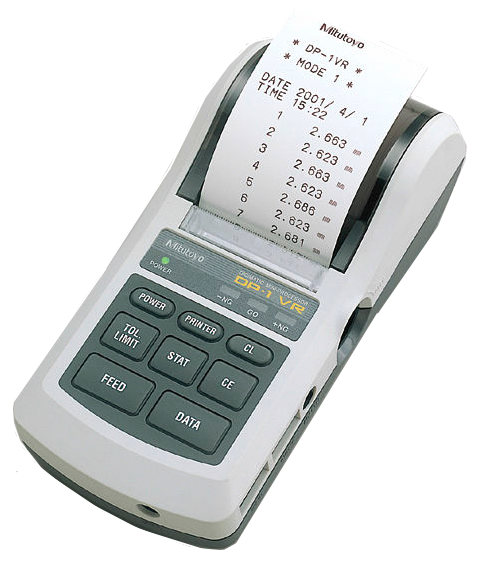
Portable printer
Suitable for real-time printing of the results obtained from the measurement. With the printer it is also possible to perform statistical calculations on batches of measurements (minimum value, maximum value, average value).
The printing of the printout of the measurements in real time allows a rapid certification of the production batch.
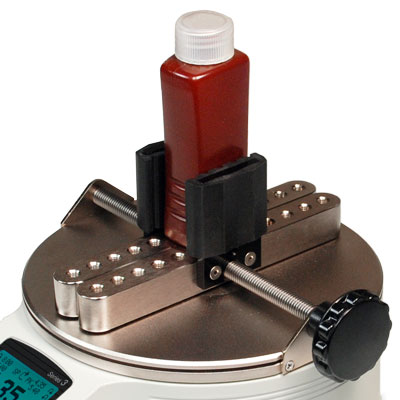
Adapters for square bottles
The adapters for square bottles also allow the measurement of bottles and containers that do not have a cylindrical shape or that have irregular shapes. The screw adjustment allows a quick adaptation to the type change.

Adapters with adjustable jaws
Adapters with adjustable jaws allow the measurement of bottles with irregular shapes or that with standard adapters do not maintain a stable position.
The two parts in contact with the bottle are adjustable and allow perfect adaptability on containers with irregular or non-cylindrical profiles.
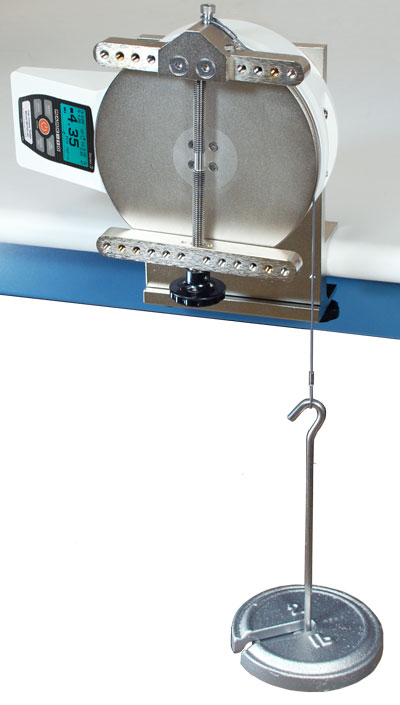
Weight certified for calibration
The certified weight for calibration allows you to quickly and immediately check the conditions of correct operation of the cap torque transducer.
The value found with the certified weight can be used for a periodic calibration check or for an internal certification of the instrument.

Tool fixing kit
For the use of the certified calibration weight, a fixing kit is available that allows you to position the torque transducer for caps in an optimal position for positioning the calibrator.
The fixing of the torque transducer for caps takes place on a horizontal surface, a table or a shelf.
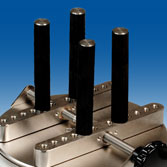
Closing pegs
Different versions of fixing pegs with different lengths are available depending on the need to fix bottles with different heights.
Standard rungs are 31mm long. Pegs of 63 mm and 100 mm in length are also available.
Torque gauges for caps with customized jaws or made according to specific needs are available.

Calibration report
A calibration report is available on request which allows you to certify the correct functioning of the instrument.

Carrying case
A carrying case for the instrument is available.
Made of plastic material and with the inside in foam material, this case allows the transport of the torque transducer for caps in a safe way.

DataSink 100 software
If you need special software, with special acquisition functions or integrated in the management system (AS400 connection, Oracle database connection, connection with Access or MySQL), it is possible to create a customized application supplied with "turnkey" mode.
Product dimensions

Torque tester for quality control caps
The CAP-TT01 series torque transducers for caps allow not only the real-time detection of the torque in screwing and unscrewing the cap but also the printing of the values obtained or the storage of data for filing on file or post-statistical analysis -process.
Typical values of torque
The following table shows the typical torque values for glass and plastic bottles with different types of common caps. The standard value (C) is closing, the standard value (A) is opening.
All values are expressed in Ncm
| Cap diameter (mm) | Phenolic / Urea stopper on glass bottle | Phenolic / Urea cap on plastic bottle | PE / PP cap on glass bottle | PE / PP cap on plastic bottle |
| 15 | 90 (C) -45 (A) | 67 (C) -33 (A) | 135 (C) -79 (A) | 90 (C) -45 (A) |
| 18 | 101 (C) -56 (A) | 79 (C) -45 (A) | 146 (C) -90 (A) | 101 (C) -56 (A) |
| 20 | 112 (C) -56 (A) | 90 (C) -45 (A) | 169 (C) -101 (A) | 112 (C) -56 (A) |
| 22 | 124 (C) -67 (A) | 101 (C) -56 (A) | 192 (C) -112 (A) | 124 (C) -67 (A) |
| 24 | 135 (C) -67 (A) | 112 (C) -56 (A) | 203 (C) -124 (A) | 135 (C) -67 (A) |
| 28 | 158 (C) -79 (A) | 135 (C) -67 (A) | 237 (C) -135 (A) | 158 (C) -79 (A) |
| 33 | 203 (C) -101 (A) | 169 (C) -79 (A) | 271 (C) -158 (A) | 192 (C) -90 (A) |
| 38 | 225 (C) -112 (A) | 192 (C) -79 (A) | 327 (C) -192 (A) | 214 (C) -101 (A) |
| 43 | 248 (C) -124 (A) | 203 (C) -101 (A) | 372 (C) -225 (A) | 248 (C) -124 (A) |
| 48 | 271 (C) -158 (A) | 225 (C) -112 (A) | 293 (C) -248 (A) | 271 (C) -135 (C) |
| 58 | 316 (C) -158 (A) | 271 (C) -135 (A) | 497 (C) -293 (A) | 327 (C) -158 (A) |
| 70 | 395 (C) -203 (A) | 316 (C) -158 (A) | 587 (C) -361 (A) | 395 (C) -192 (A) |
| 89 | 508 (C) -248 (A) | 406 (C) -208 (A) | 734 (C) -451 (A) | 508 (C) -248 (A) |
| 100 | 564 (C) -282 (A) | 451 (C) -225 (A) | 847 (C) -429 (A) | 564 (C) -282 (A) |